Maths is everywhere. We all use math in everyday applications whether we are aware of it or not. If you look hard enough, you’ll see math emerge from some of the most unlikely places be it the shape of dish antenna or the loudspeaker. From playing games to playing music, math is vital to help students fine tune their creativity and turn their dreams to reality. Math is the universal language of our environment, helping mankind explain and create.
Learning Math from an early age: The developmental benefits of introducing children to numbers are that they start to think logically and develop reasoning, which is exactly why children should be introduced to math concepts such as geometry and arithmetic early. Children learn fundamentals of math through playing games and do-it-yourself activities of art and craft. Mental Arithmetic is very important as it allows children to form links between numbers and understand how they work.
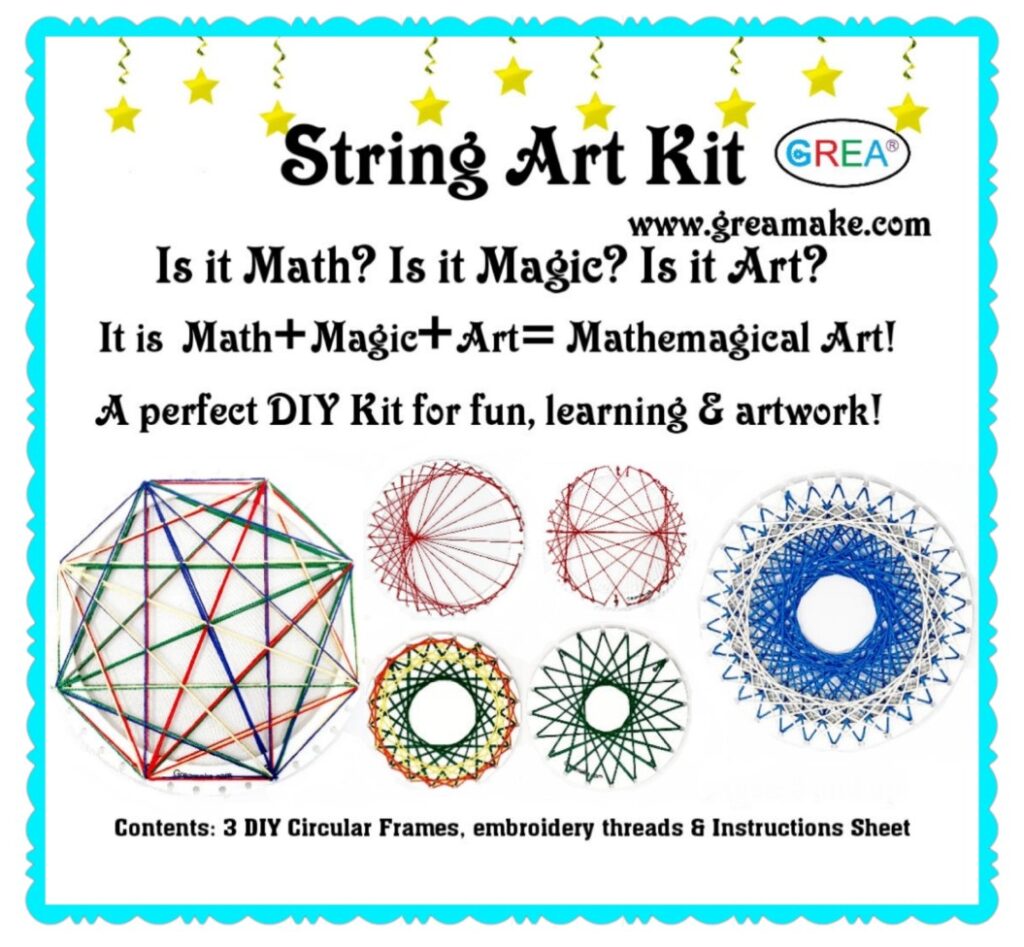
What is String Art?
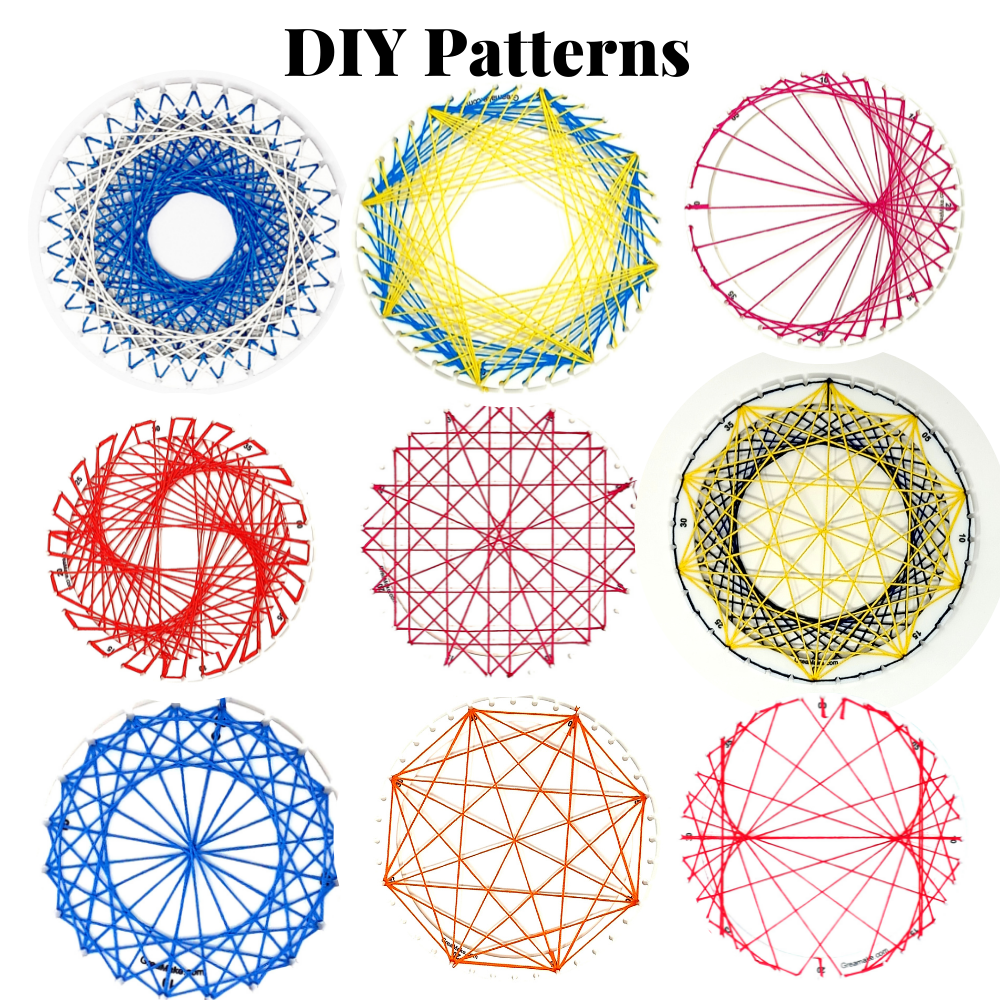
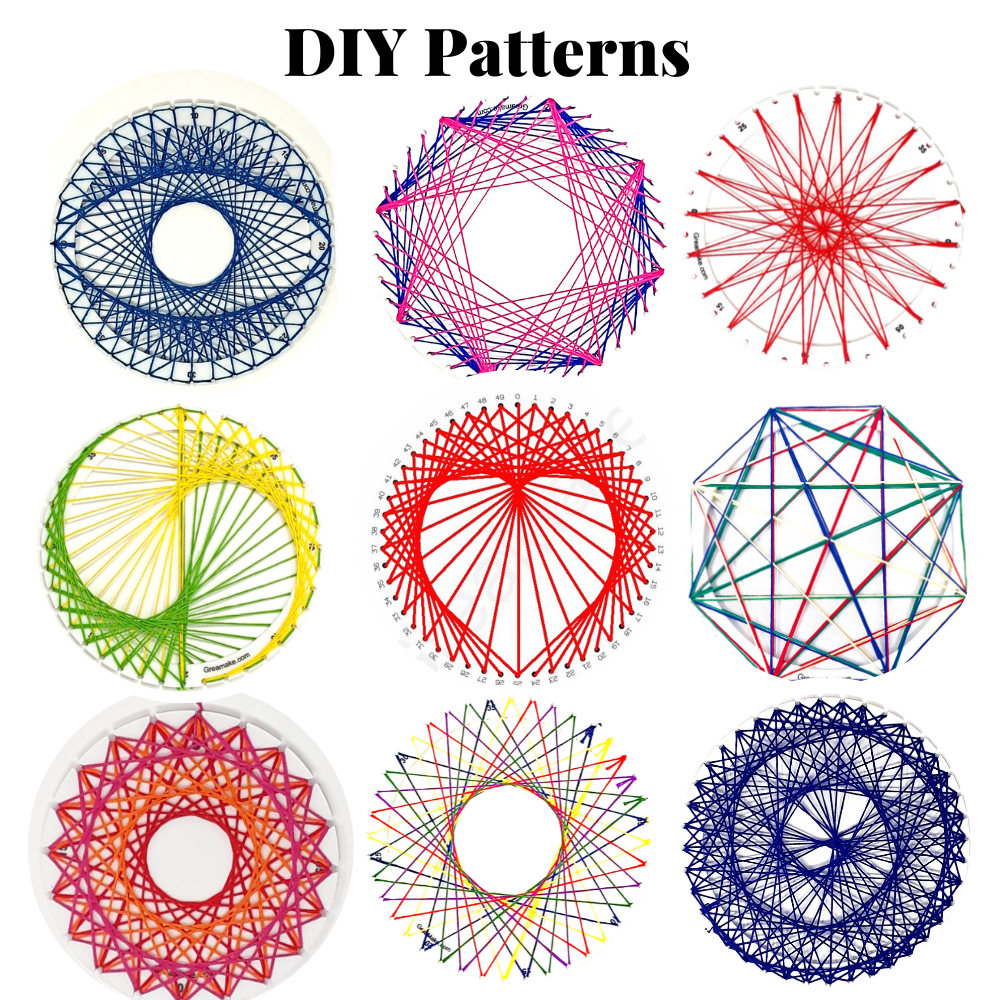
Symmography or “string art” is the arrangement of colored threads between points to form geometric patterns. Is it Math? Is it Magic? Or Is it Art?It is Mathemagical Art! Using colorful strings, a child can create beautiful geometric shapes with our String Art frames. Even the youngest artist can work on this with ease. It is a great way to learn or teach Math. Once completed it becomes a décor or a proud display worth hanging on the wall. Or the strings can be removed and again tried for a different number. Different patterns emerge with different numbers and combinations and different colors of strings and there is no end to creativity or learning with String Art. From creating a simple design to more complex ones the child develops abilities to create various patterns and shapes.
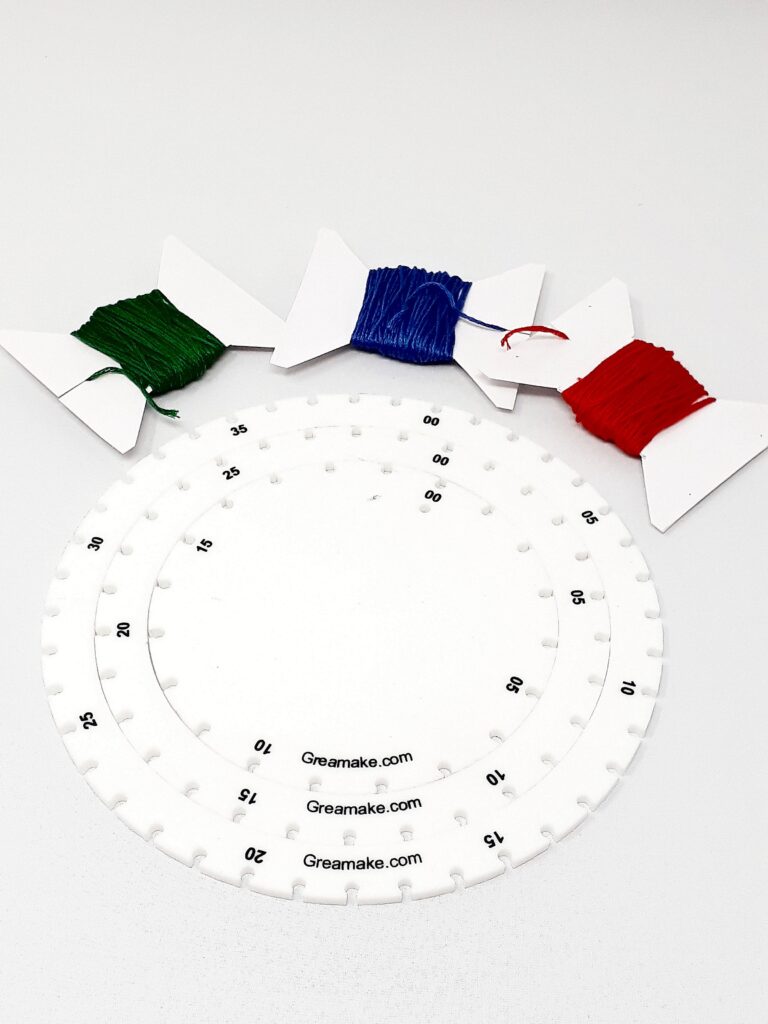
The Kit contains 3 DIY Frames , 3 spooled color threads and instructions sheet. The frames are nested and can be separated as a center slab of points 20 and 2 frames of points 30 and 40.
Download and print the above Pen Paper Practice Sheets and watch tutorials below to understand how to start working with the practice sheets.
30 points Sheet and Superimpose Method : Addition
Draw lines between points adding a constant number, start from 0 and complete the entire circle of points.
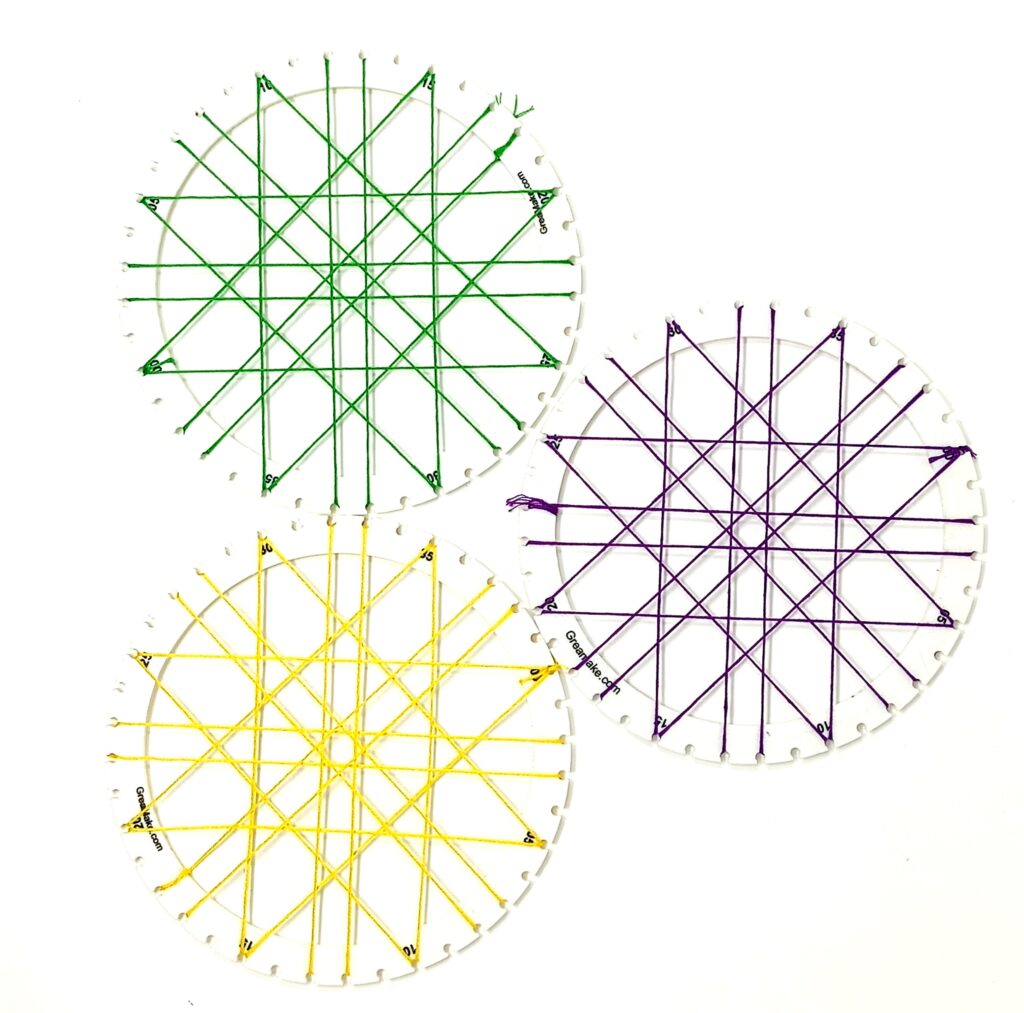
30 points sheet and Polygons:
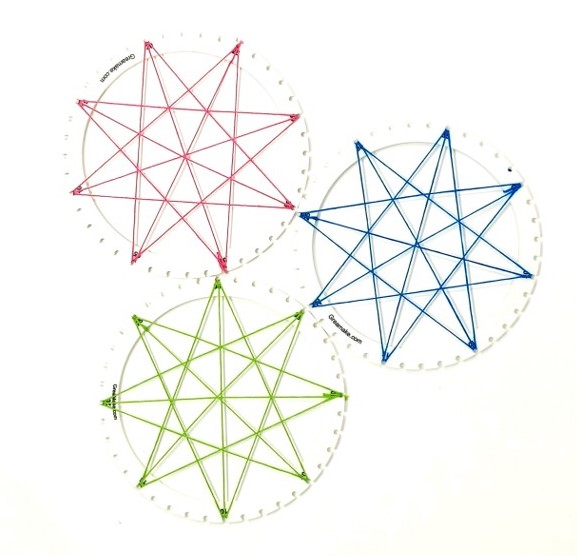
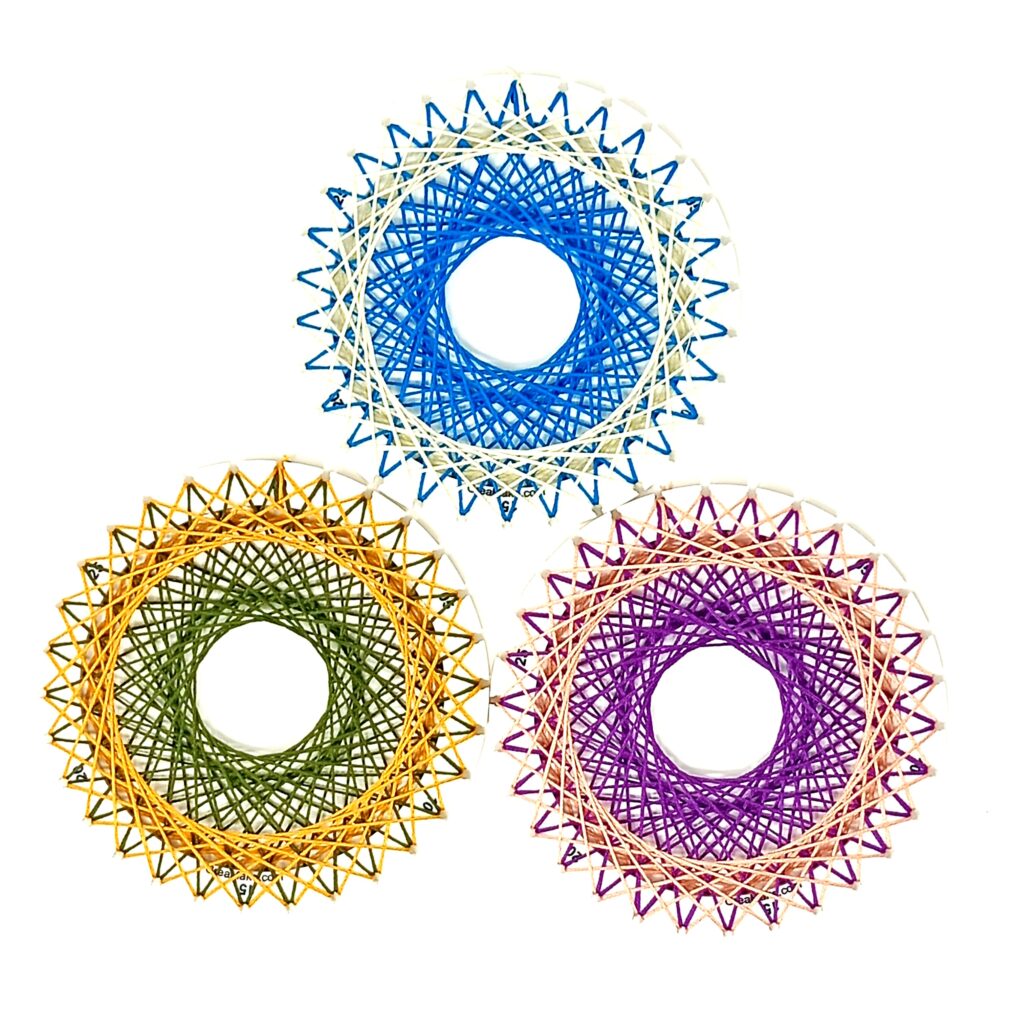
30 points Sheet and Stars: Progressions
50 points Sheet Cardioid: Odd Numbers
50 points Sheet and Spiral : Skip Counting
Start from the diameter. Start Pt increases by 1. End point increases by 1 and skips one every 5 numbers.
Second Step in Stringing using the String Art Kit:
String Art is same as pen paper sketching, except that a string is a continuous thread and cannot be lifted out of the paper like we lift the pen, for jumping points. So the stringing procedure is slightly different. Step by step Animation videos and Math Sheet will help in understanding this procedure and the sequence.
Note: In Math Sheets, F means joining the points with the string in Front of the Center Slab/Frame and B means joining the points with the string at the Back of the Slab/Frame
Stringing with Center Slab Method:
How to Knot at beginning of Stringing with the Center Slab:
The center slab is provided with a hole below Point 0 to help in knotting the string at the beginning of stringing.
Pass the string through the hole from behind the center slab, and knot the string at point 0 as shown in video below.
Make at least 2 knots so that the string does not get loose.
How to knot at the end of Stringing with the Center Slab:
After the pattern is completed, knot the beginning loose end with the final end of string.
While doing so, while tightening the knot, the knot can be made to sit in the notch of point 0 as shown in video below.
Again make at least 2 knots at the end of stringing so that the string does not get loose.
Take a print out of the Math Sheet.
Follow the sequence of steps in the Math Sheet.
As you complete each step tick it off on the printout and move on to the next step.
Ticking will help in keeping the sequence to know which step you are currently in and which step to do next.
In the Math Sheet : F means Front and B means Back
Basic Stringing with Center Slab Tutorial 1
Here, ADDITION Pattern is got by adding 5 in Front and subtracting 4 at Back of Slab. At the end of stringing, 2 patterns are seen. One is ADDITION PATTERN 5 at Front and the other is ADDITION PATTERN 4 at the Back of Slab.
Here, ADDITION Pattern adding 10 in Front and 9 in Back is first completed. Then it is superimposed with ADDITION Pattern 6 in Front and 5 in Back . The superimposed pattern is got by continuing with the same string.
We now use the Frames (not the center slab) and do the stringing.
Make a knot at the top of the frame at point 0.
Then follow any one of the three methods described below to get the path of the string.
For practice and ease of stringing, create a Math sheet as shown in each case before starting to string.
Follow the path in the Math Sheet to get the next point .
Sample Math Sheets are provided. Take a print out of the Math Sheet. Follow the sequence of steps in the Math Sheet. As you complete each step tick it off and move on to the next step. Ticking will help in keeping the sequence to know which step you are currently in and which step to do next.
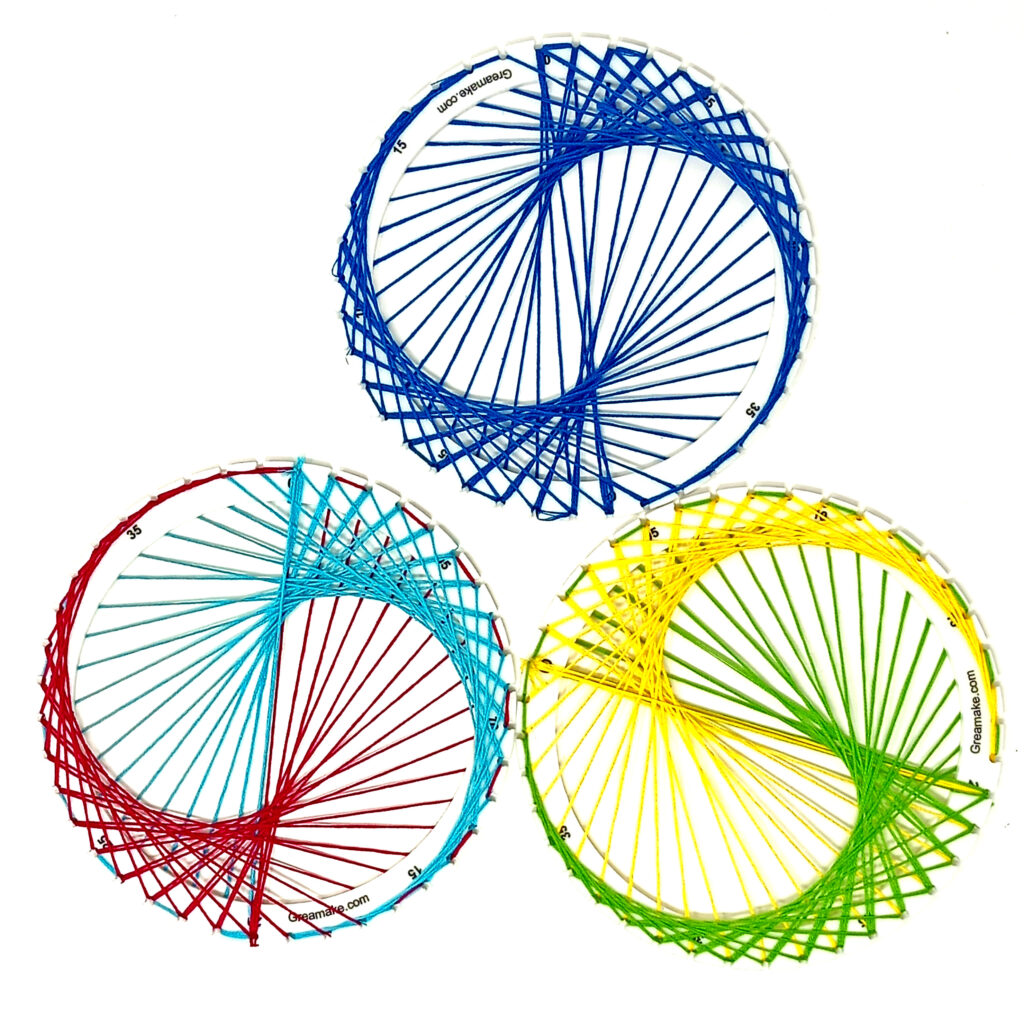
Simple Method (METHOD 1) with 30 points Frame of String Art Kit
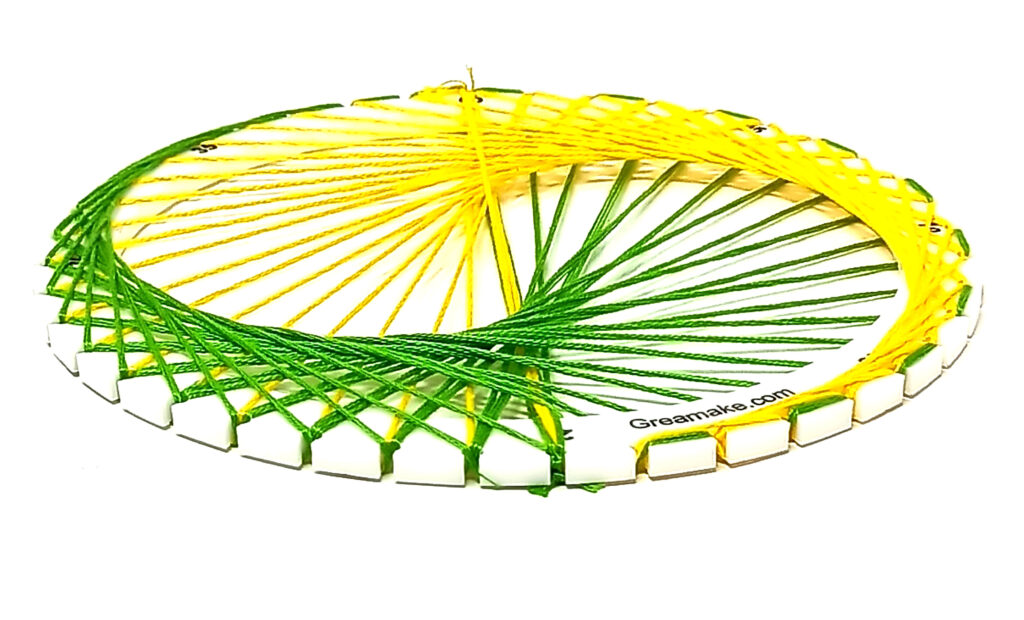
Follow the same steps as done in center slab method for creating various patterns on the frame. Sample Math Sheet provided for ADDITION 10 at Front and 9 at Back is provided.Unlike the center slab Methods, the thread at the back will be seen from the front as the frame is not covered at the center, giving a 3 dimensional effect.
But this can also be a disadvantage, as some of the patterns will not be clearly visible if stringing is done on both sides. Also the length of thread required is much more than stringing on one side.
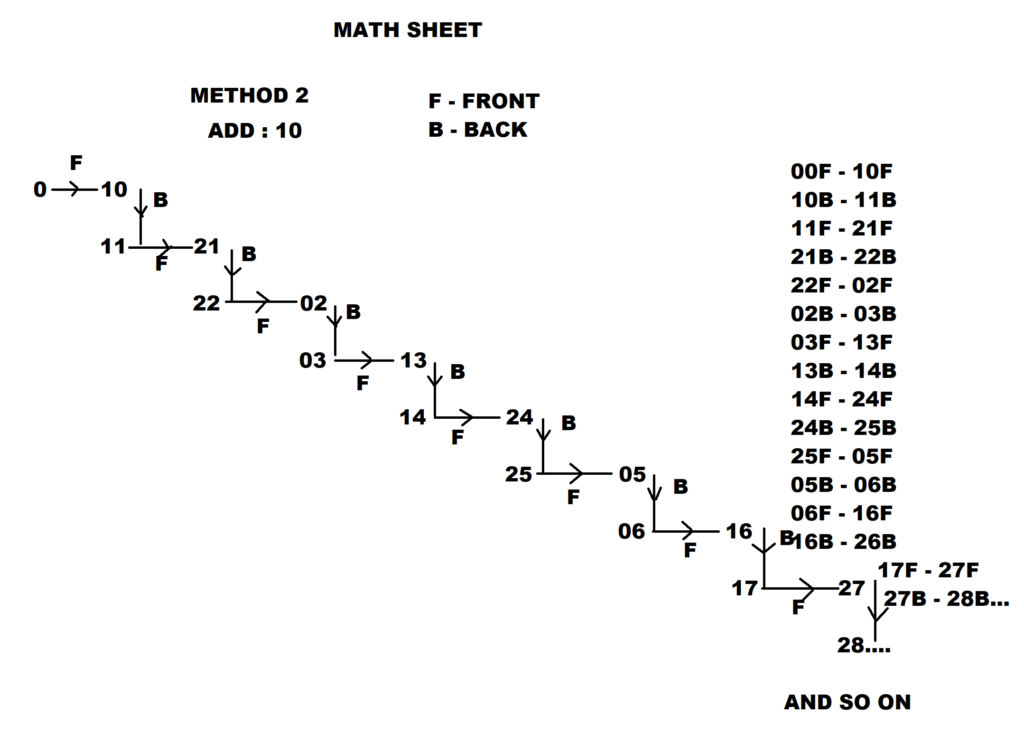
Sequential Method (METHOD 2) with 30 points Frame of String Art Kit
The advantage of Sequential Method (Method 2) over Simple Method (Method 1) is that the pattern is made only on one side of the frame. This gives a clear view of the pattern and also the length of thread used is much lesser. A sample Math sheet for adding 10 using Method 2 is shown and how to generate the Math sheet is also shown.
Basically in this method, the string joins the points in the front and hops to next point at the back. Whenever the total exceeds the number of points in the frame ,here 30, then subtract 30 to get the next number.
Animation of Stringing the 30 Point Frame using Method 2 :
Sample: Add 10 : In the Paper Pen path drawn below, the curved short lines shown indicate the path of the string at the back of the frame which is essentially hopping to the next consecutive point. The straight lines indicate the path of the thread at the front of the frame.
How to generate Math Sheet for Stringing the 30 Point Frame using Method 2:
In the Math Sheet, F indicates Front and B indicates Back.
Forward and Backward Method (METHOD 3) with 30 points Frame of String Art Kit
The advantage of Forward and Backward Method (Method 3) over Simple Method (Method 1) is same as that of Sequential Method, that is, the pattern is made only on one side of the frame. This gives a clear view of the pattern and also the length of thread used is much lesser.
It is advisable to prepare a Math Sheet and then start stringing the frames. A sample Math sheet for adding 10 using Method 3 is provided, also how to generate the Math sheet is shown.
The string joins the points in the front and hops to next point at the back.
Animation of Stringing the 30 Point Frame using Method 3 :
Sample Add 10 : In the Paper Pen path drawn below, the curved short lines shown indicate the path of the string at the back of the frame which is essentially hopping to the next consecutive point. The straight lines indicate the path of the thread at the front of the frame.
How to generate Math Sheet for Stringing the 30 Point Frame using Method 3:
In the Math Sheet, F indicates Front and B indicates Back. Add 10 to get the connecting points.
CARDIOIDS
A cardioid (Heart Shape) is a plane curve traced by a point on the perimeter of a circle that is rolling around a fixed circle of the same radius.
NEPHROIDS
A Nephroid(Kidney shape) can be generated by rolling a circle with radius on the outside of a fixed circle with radius
OTHER EPICYCLOIDS
Epicycloid is a plane curve produced by tracing the path of a chosen point on the circumference of a circle which rolls around a fixed circle.
How to generate CARDIOIDS, NEPHROIDS , and other EPICYCLOIDS with String Art !
MULTIPLICATION TABLES GENERATE THE CARDIOIDS, NEPHROIDS AND OTHER EPICYCLOIDS
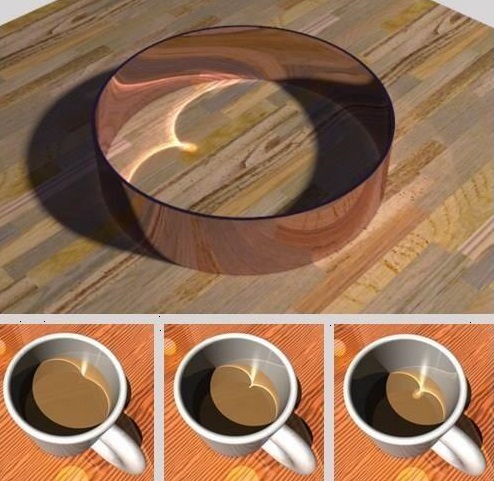
Have you ever observed the shape formed in a coffee cup? It is a CARDIOID shape. Ever wondered how a cardioid shape is formed in a coffee cup? Below GIF from @TamasGorbe on Twitter that shows the actual geometrical formation of cardioid by reflection of light rays:
Image From Miss E Bowker @MissBowkerMaths in Twitter
So , what is a CARDIOID in Math?
A CARDIOID (Heart Shape) is an EPICYCLOID and it is a plane curve traced by a point on the perimeter of a circle that is rolling around a fixed circle of same radius.
A full circle covering all points must be done. ie.. if 40 point frame is used, then upto 40 x 2 = 80 (for cardioid) must be calculated and stringing done. Whenever the product number exceeds the total number of points, then the total number of points must be subtracted from the product. For eg., 20 x 2 = 0 (40 – 40 = 0) 21 x 2 = 2 (42 – 40 = 2) and so on. In other words, 20 x 2 = 0 (40 MOD 40)
NEPHROID: Multiplication by 3. Math sheet shown below for reference…
Other EPICYCLOIDS : Multiplication by 4 and so on… Follow the same method as in Cardioid.
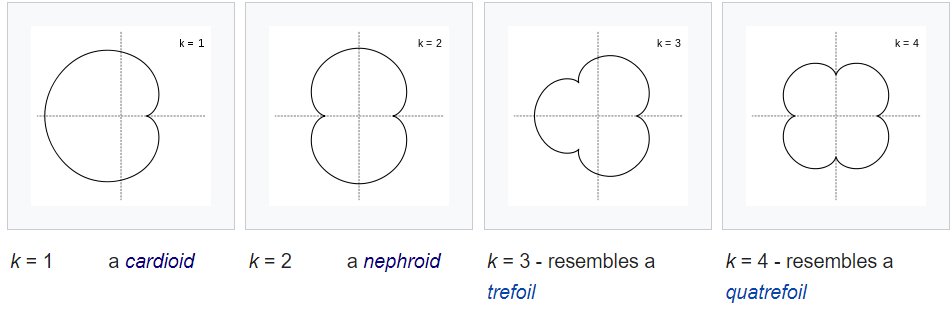
Note: As we go higher up in stringing the epicycloids with the GreaMake string art frames, the shape formed will be not as sharp as a cardioid as we need more points on the circumference for a proper sharp shape to be seen.
Refer images below for the different epicycloids which can be formed with the multiplication tables. Here k denotes the cusps. A cusp of k=1 is formed with 2 times table, a cusp of k=2 is formed with 3 times table and so on….
Image source: Wikipedia
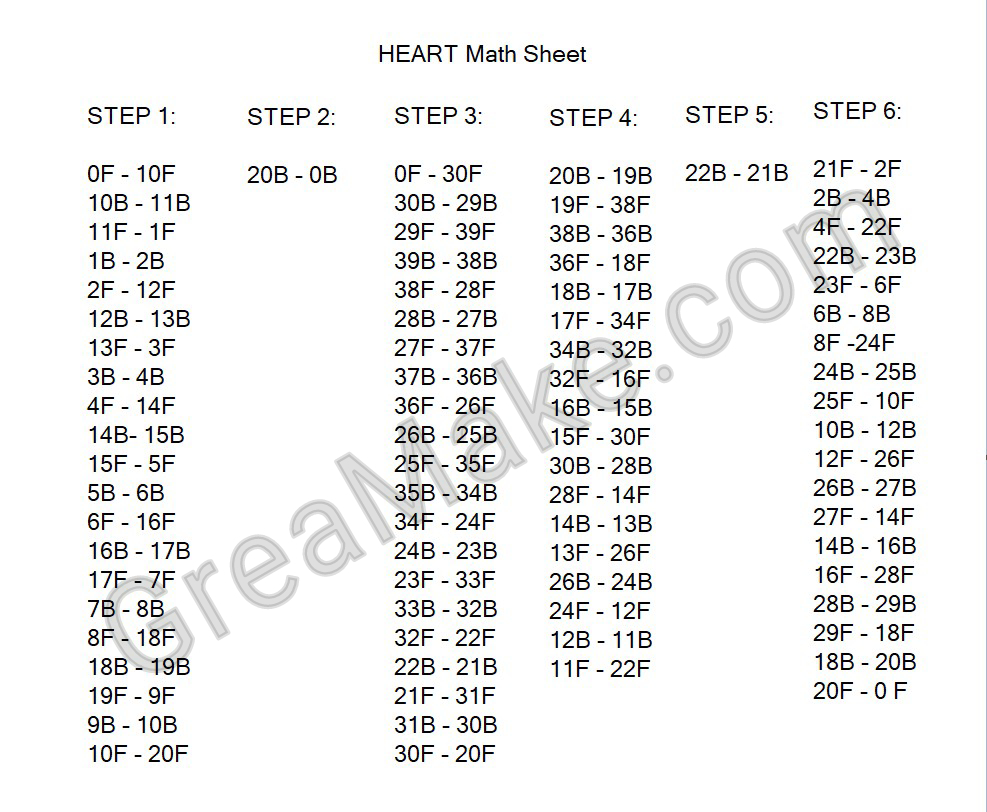
Stringing the HEART Shape String Art:
This is an interesting combination of addition, subtraction and multiplication of numbers.
There are 6 steps involved in stringing the HEART shape.
Step 1: Knot and start at 0. Add 10 in front clockwise hopping one at back starting from 0F – 10F and ending at 10F – 20F.
Step 2: Take the string from 20B to 0B across at back.
Step 3: Subtracting 10 in front anti clockwise hopping one at back starting from 0F to 30F and ending at 30F – 20F.
Step 4: From 20B hop to 19B and string from 19F to 38F. Now using multiplication by 2 string up to 11F to 22F.
Step 5: Hop to 21B. Now string from 21F to 2F (42-2) and using multiplication by 2 string up to 18F.
Step 6: Hop at back to 20B. Take the string from 20F to 0F across and knot the beginning and end of string.
The Math sheet provides the Step by step instruction.
Also the Animation video helps in understanding the steps and the stringing video helps in stringing.
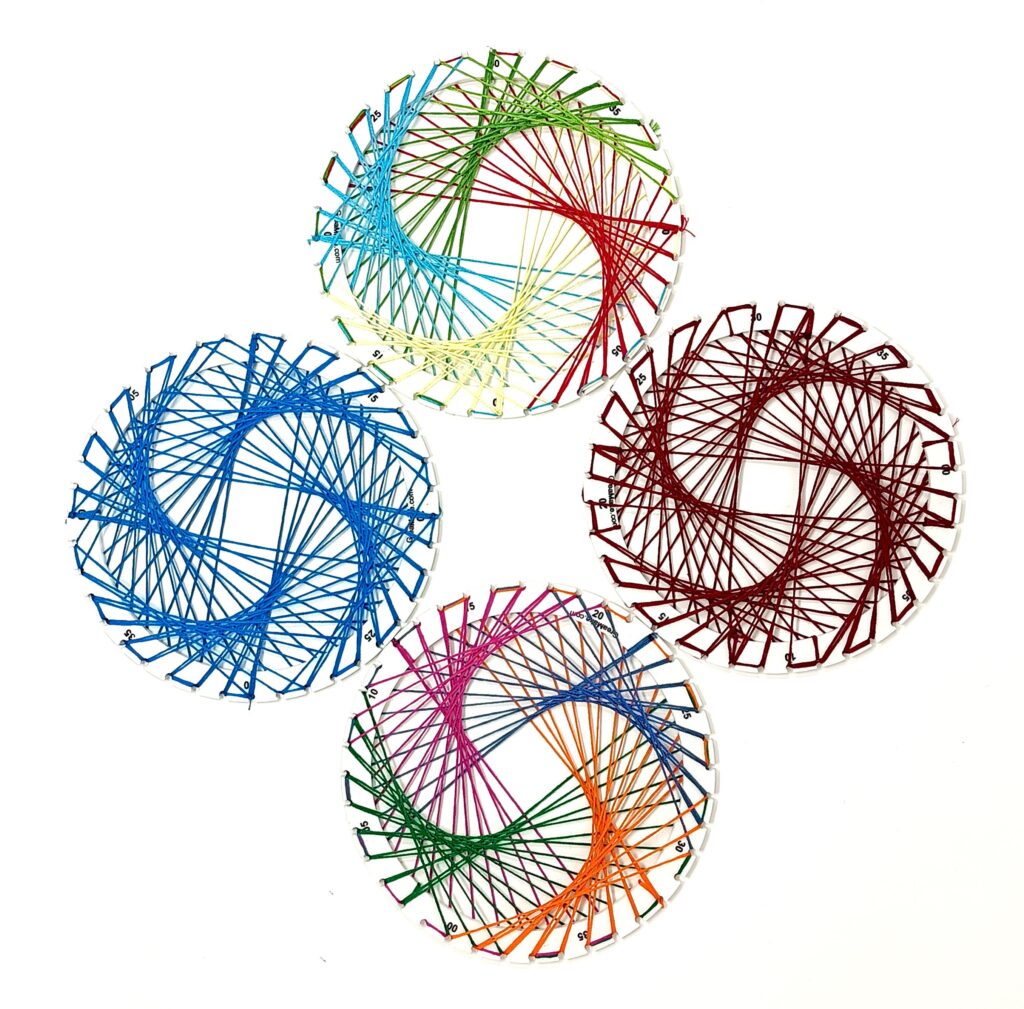
YIN YANG : In Ancient Chinese philosophy, YIN and YANG is a concept of dualism, describing how seemingly opposite or contrary forces may actually be complementary, interconnected, and interdependent in the natural world, and how they may give rise to each other as they interrelate to one another.
Stringing the YIN YANG Pattern in String Art:
Stringing the Yin Yang involves stringing in 2 layers and switching the thread from top to bottom and vice versa.
The first layer involves adding 20, get the string from front to back at 20, hop 1 at front to reach 21, and subtract 21 , and pass the string from back to front, to reach the starting point again. Now hop at back to the next point.
The stringing is done such that the pattern Yin and Yang is at the top and the connecting lines go below the patterns.
Repeat the same for the second layer preferably in a different color and start at 20 instead of 0 now.
Stringing the CELESTIAL STARS Pattern in String Art:
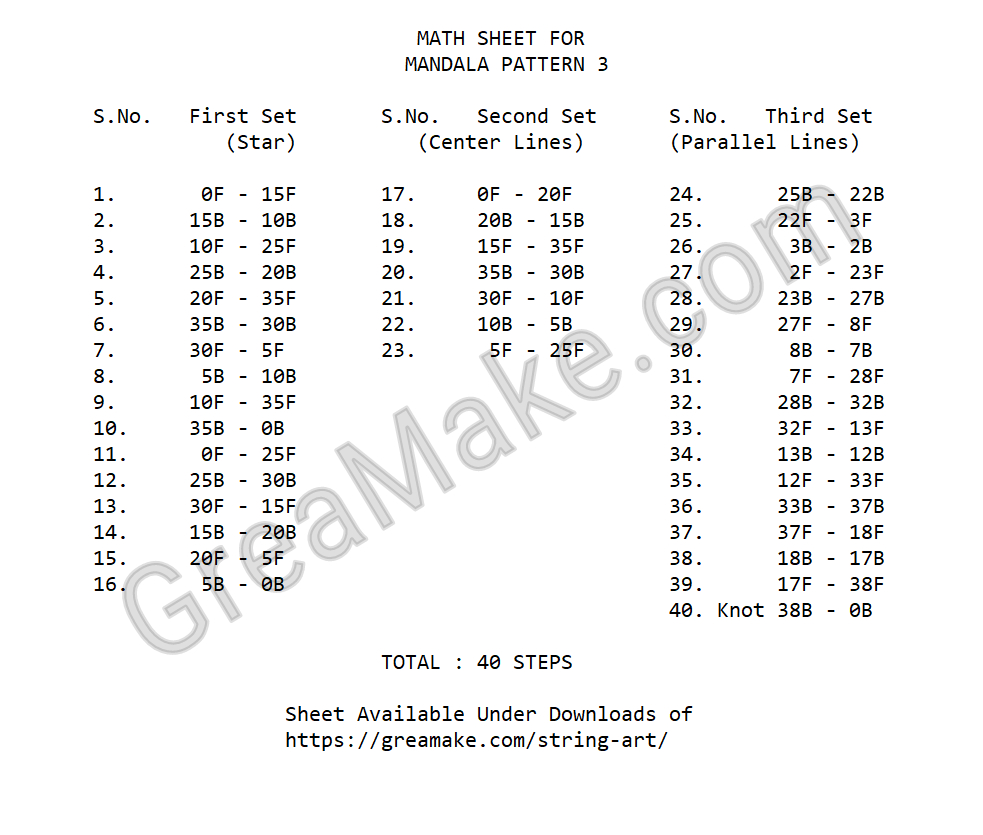
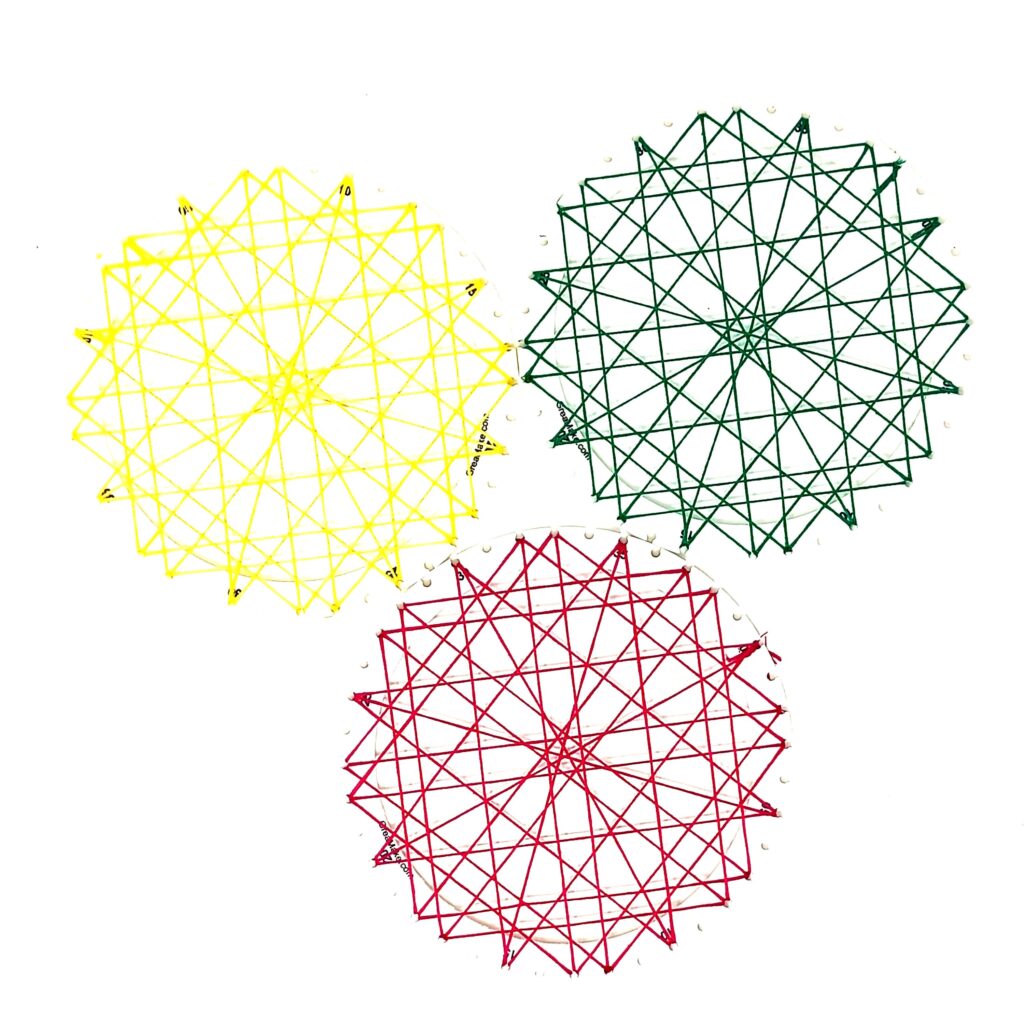
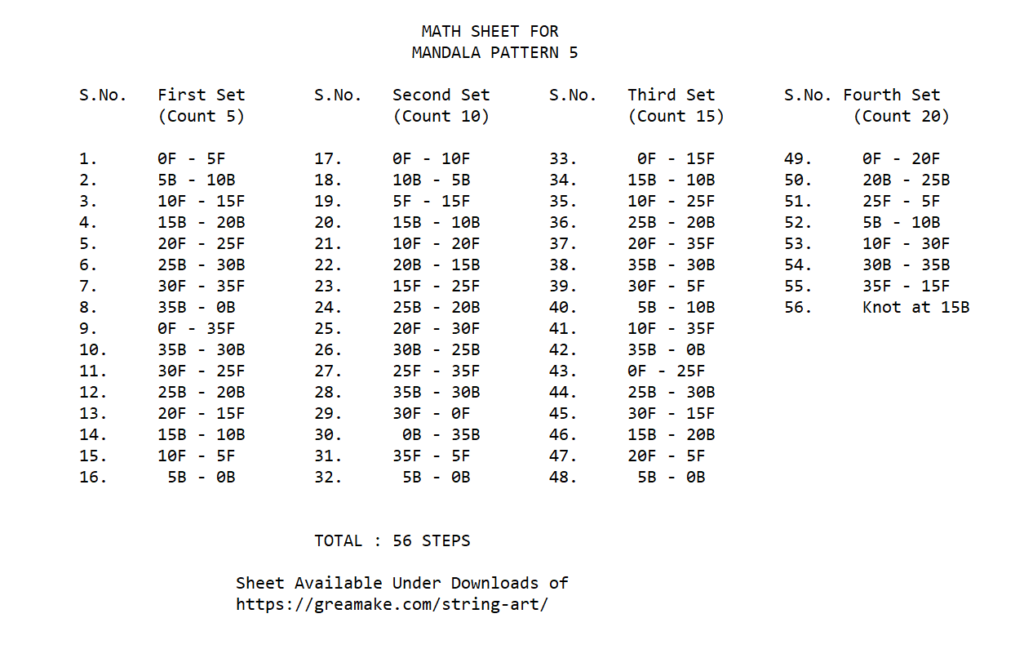
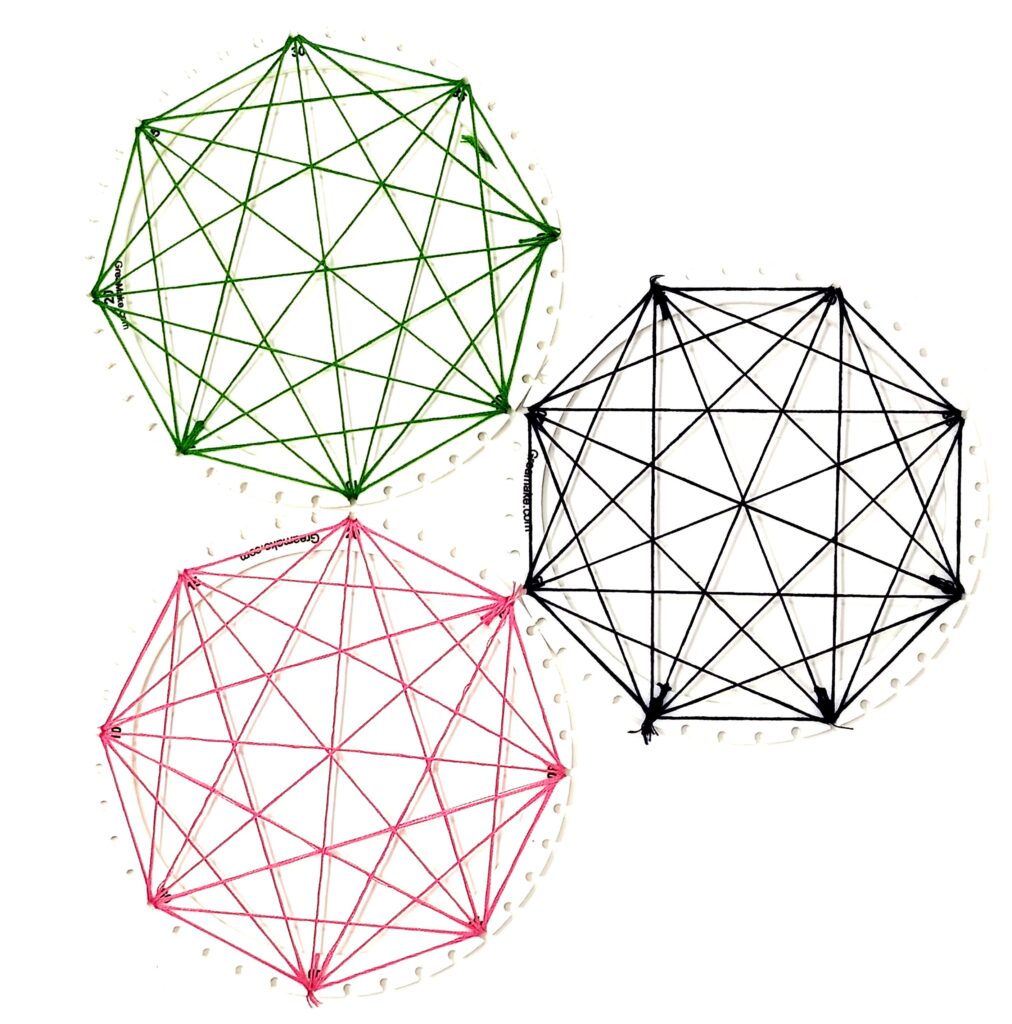
Stringing the MANDALA Patterns in String Art:
What is MANDALA ?
Mandala art is a geometric design that holds a great deal of symbolism in Hindu and Buddhist cultures. Mandala art is a Sanskrit word for “magic circle”.
People believed that Mandalas represent different aspects of the universe and are used as instruments of meditation and symbols of prayer most noticeably in China, Japan, and Tibet.
The Swasthik is a geometrical figure and an ancient religious icon. The name swasthika comes from Sanskrit and denotes “conducive to wellbeing or auspicious”.
Stringing the DOOR MAGIC EYE Pattern in String Art:
What is DOOR MAGIC EYE?
The Door Magic eye viewer help you to identify the person standing outside without opening the entrance door.
Start with the center slab and make a knot below zero. Then start adding numbers and connecting the points. Check out the detailed step by step video provided.
Start with a color pen and draw lines on the 30 points pen paper sheet provided. Then start stringing on the center slab. Check out the step by step instructional videos.
Math Geometry and string art are closely related. Addition and Multiplication results in different patterns in string art. First draw the lines on the pen paper sheets provided. Then start string them using the frames and center slab.
First draw the cardioid on the 50 point pen paper sheet. (You can download the 50 point sheet, link provided). Then follow the step by step easy to follow instructions in the video.
Embroidery threads in different colors available in local shops can be used. It is better to spool the locally available threads onto any cylindrical paper/carboard piece to avoid tangling while stringing.